Welcome to the Silva Business Support Family
Welcome, we’re so happy you’re here! This page will guide you through everything you need during your onboarding process. Think of it as your home base while we get everything set up for your brand. At SBS, we put a lot of care into onboarding because it’s the foundation of everything we do. We take the time to truly understand your business, your voice, and your goals so that when we start posting, it feels aligned and intentional. We can often have your content calendar ready and begin publishing within as little as two weeks, though timing may vary depending on how quickly we’re able to schedule your first content day. We know this process can take a little time (especially when you’re running a business) but this upfront investment allows us to create stronger, more effective content right from the start. We’ll walk you step-by-step through everything below so you always know what’s next. Let’s get started!
Step 2: Pay Your First Invoice
To officially kick off your services with SBS, the first step is to complete your initial invoice.
Once you’re ready to move forward, we will send your first month’s invoice right away. We encourage you to complete this as soon as possible, as payment allows us to begin working on your account immediately, even if your official start date is later.
We often begin onboarding, strategy, and content planning ahead of your official start date so we can hit the ground running and begin posting as soon as possible.
Ongoing Invoicing
Invoices are sent via Squarespace at the beginning of each month
Payment is due by the 10th of the month
This keeps everything consistent and ensures there are no interruptions in your service.
Mid-Month Start Dates
If you choose to start services in the middle of a month, here’s how we handle billing:
Your first invoice will still reflect the full month
On your second invoice, we will apply a credit for the unused time
For example:
If your services begin on January 10th, your January invoice will be for the full month. Then, your February invoice will include a credit for the first 10 days of January. This allows us to get started right away without delaying your onboarding or content creation.
Step 1: Sign Contract
Once you’ve received your invoice, the next step is signing your contract.
We will send over a customized contract via Squarespace that outlines your specific services, expectations, and details of your agreement with SBS.
Please review and sign this as soon as possible so we can continue moving forward with your onboarding and begin working on your account without delay.
Step 3: New Client Questionnaire
Now it’s time for us to learn all about your business!
Your onboarding questionnaire is one of the most important steps in the process. It gives us insight into your brand, goals, audience, and preferences so we can create content and strategies that are fully aligned with your vision. Please complete the form that corresponds with the services you’ve signed up for below:
Social Media Management Clients
For clients enrolled in ongoing social media management services
Website Design Clients
For clients working with us on a website design or website build project
Ads Management Clients
For clients utilizing Meta Ads and/or Google Ads management services only
Step 4: Give SBS Access
Next step is to give us access to all accounts. This will not take away any access or abilities that you have and adds us to the account. You will still have the ability to remove us at any time. Below we have some instructions on how to add us.
Step 5: Schedule your first content day
The last step is to schedule your first content day! Content days can be easily scheduled on our scheduling platform. Make sure to choose the appointment type of SBS first content day because our initial content day will be our longest since we are getting all the content we need to start. After the first content day, you can easily schedule your monthly content day on our scheduling platform as well.
Note: We know that a lot of our clients have businesses with nontraditional business hours, so if a time or day would work the best and it is not available on the booking calendar, send Delaney a message and she or another employee will do our best to come out to get content.
How ToYou need to have full access to the page or an owner of the pageGive SBS Meta Access
1. Go to Business Settings in Business Manager or Settings in Meta Business Suite. 2. Below Users, select Partners3. Click Add. Select Give a partner access to your assets4. Enter your partner's business ID: 948027735743404 - Click Next. 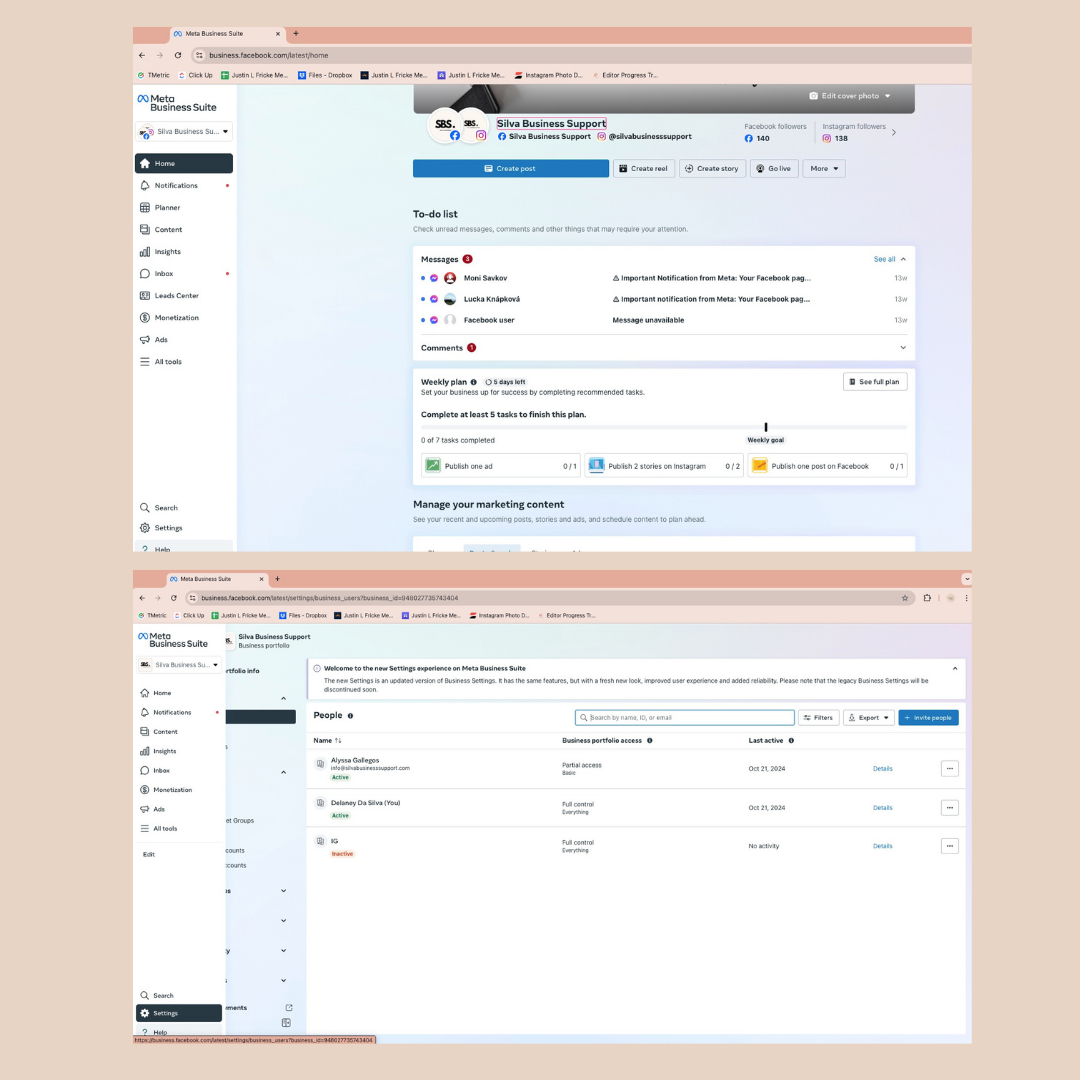
5. Choose Full Control. Click Save Changes. You can no see the business assets you've shared in your respective portfolios. 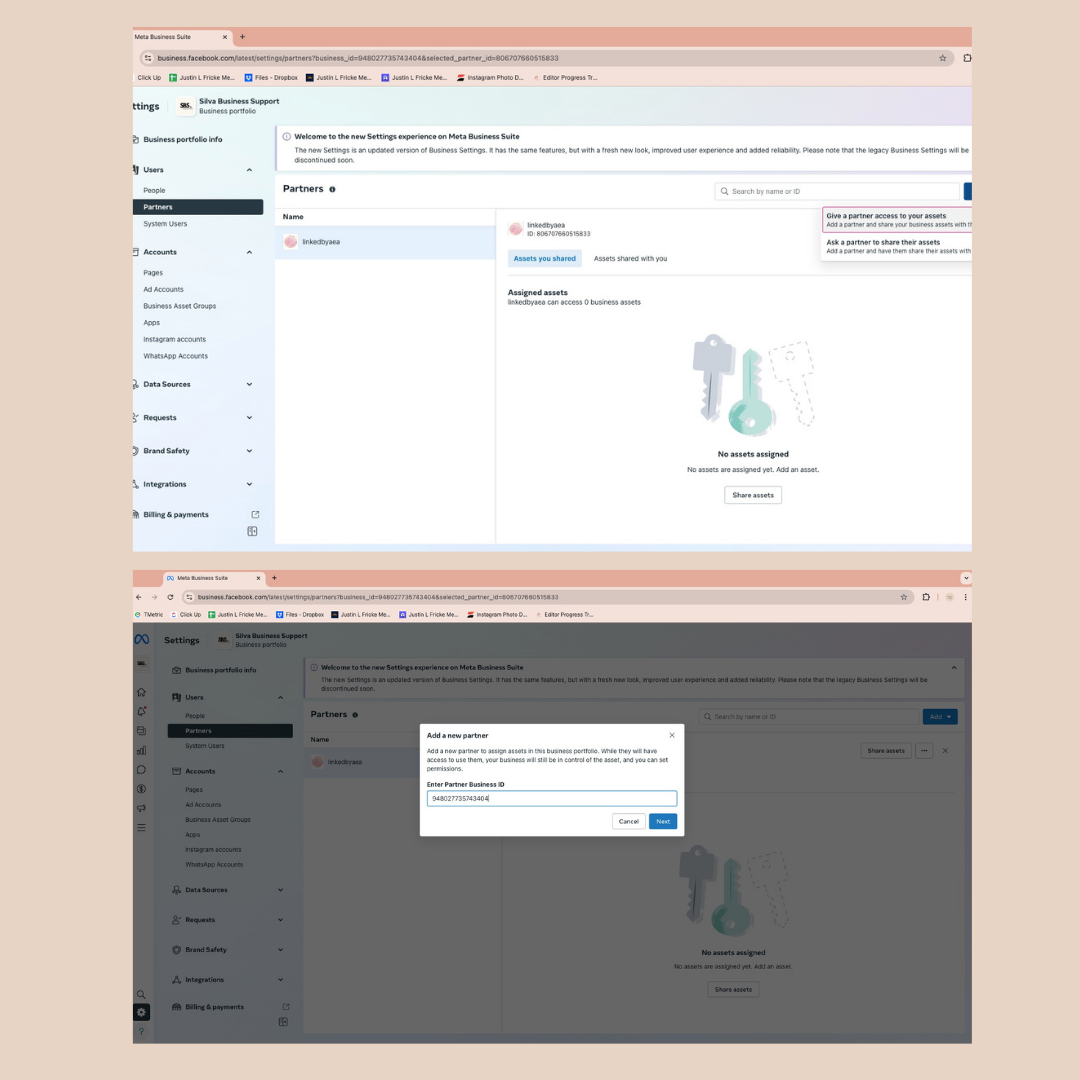
How ToGive SBS Google Business Profile Access
1. Head to your Google Business Account and login using the account that manages your business profile. 2. Once you are in your dashboard - select business name if more than one is listed. 3. Click on the three-dot menu on the top right of the business card and choose business profile settings, then click people and access. 4. Click the blue "Add" button (top right)5. Enter delaneysilva@silvabusinesssupport.com. Choose Manager Role - Click InviteHow ToGive SBS Google Ads Access
If you do not have a Google Ads account for your business one can be easily made for you once you grant us access to your business profile.1. Head to your Google Ads and login using the account that manages your business profile.2. In the upper right corner (wrench icon), click Tools & Settings, and under Setup, select Access and Security - Click blue + ButtonEnter delaneysilva@silvabusinesssupport.com choose admin, click send invitationHow ToGive SBS Meta Ads Manager Access
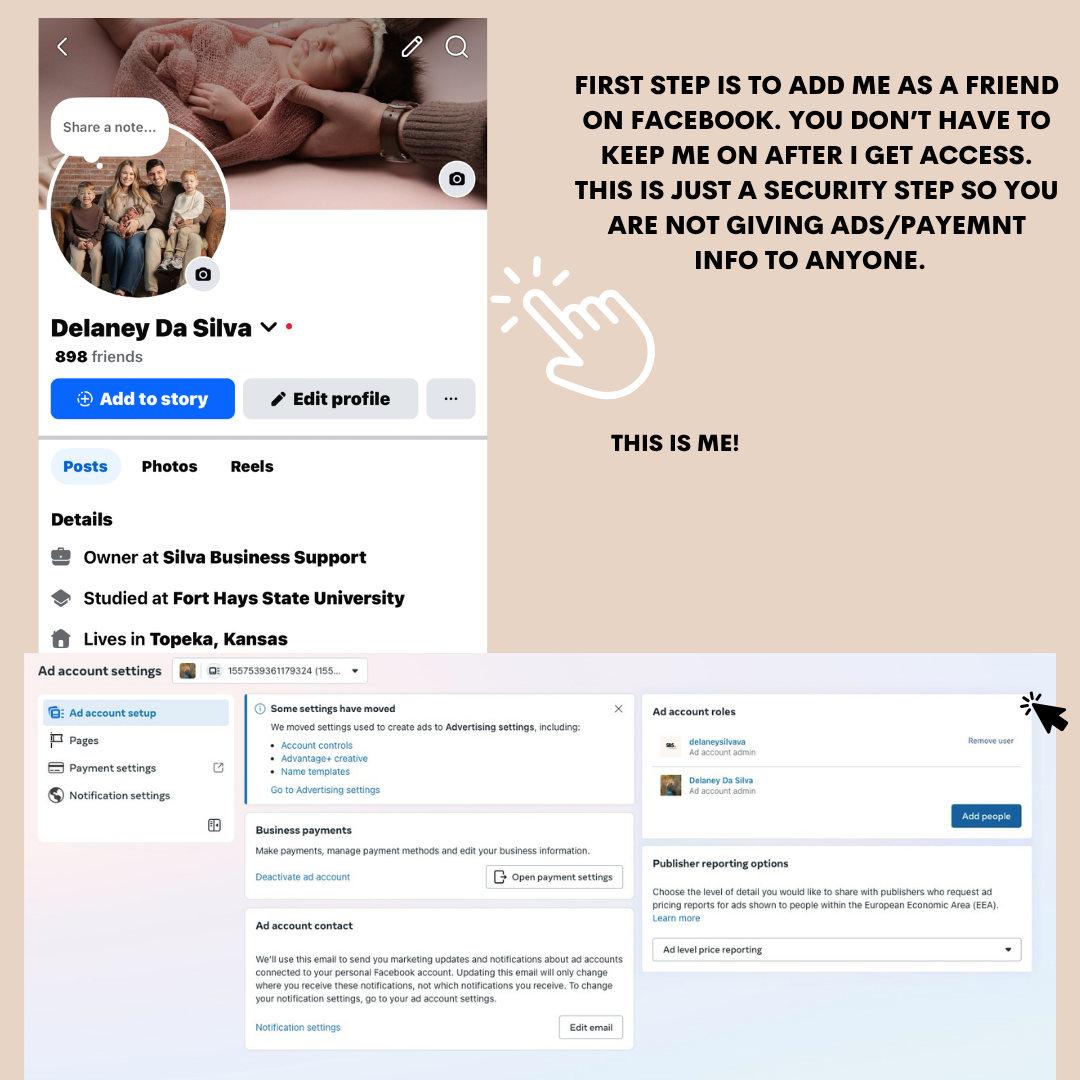
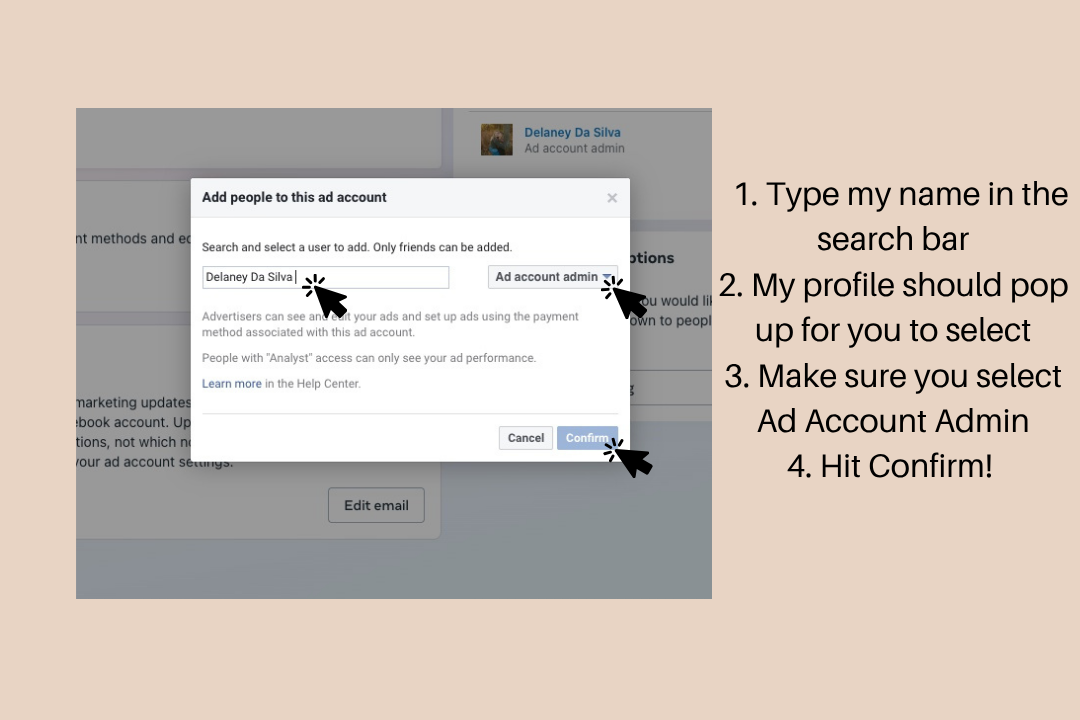
1. You must add me as a friend on facebook before starting. Because this allows me to access payment profiles they require an extra security step. If you are waiting on me to add you back just send me a message. 2. Go to Ads manager settings. You may be asked to re-enter your password. 3. Below Ad account roles, select Add people. 4. Type Delaney Da Silva and my profile will appear. Use the dropdown menu to choose admin role and then click Confirm.